Some of the links in this post may be affiliate links. If you decide to buy through them, it helps us grow Sprout Share.
Thank you for your support.

Keywords: allotment assessment, new allotment guide, allotment clearing, weed identification, allotment planning, overgrown allotment, allotment weeds, clearing allotment plot, allotment beginner tips, allotment preparation
Getting your hands on a new allotment is incredibly exciting, but before you start dreaming about perfect rows of vegetables, there’s some crucial groundwork to tackle. The first step? A proper allotment assessment of what you’re actually working with.
Why Proper Allotment Assessment Matters
Most allotments come with their fair share of challenges. Overgrown weeds, compacted soil, mystery plants, and sometimes unwelcome visitors like ants. Taking time to properly conduct your allotment assessment before diving in will save you hours of frustration later and help you create a realistic timeline for getting your allotment productive.
Getting Your First Allotment: What to Expect
Measuring Your Allotment: Know Your Space
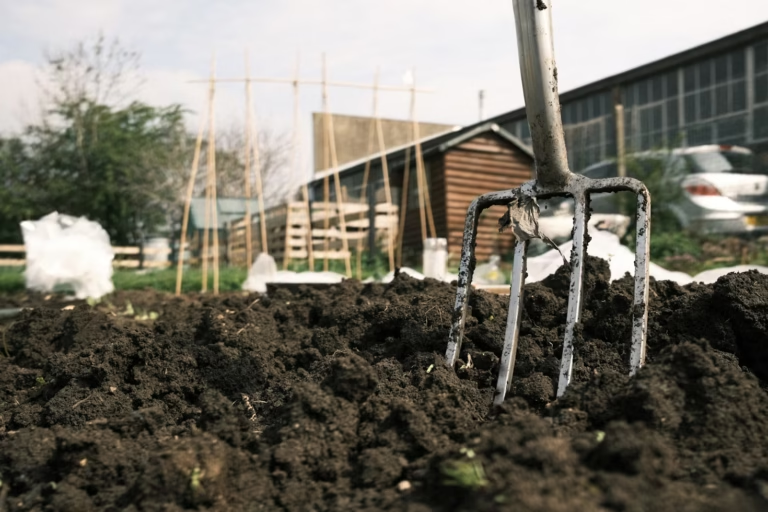
The very first thing we did was grab a tape measure and work out exactly what we were dealing with. Our plot measured 16 meters by 4.3 meters, that’s roughly 69 square meters of potential growing space.
Knowing your exact dimensions is essential for:
- Planning your layout and bed sizes
- Calculating how much compost, mulch, or seeds you’ll need
- Determining realistic goals for your first season
- Budgeting for materials and plants
Don’t just estimate. Measure properly. You might be surprised by how much (or little) space you actually have. For more guidance on allotment planning, check out the National Allotment Society’s resources for plot holders.
Identifying Common Allotment Weeds
Every allotment tells a story through its weeds. Some are annual nuisances that’ll disappear with regular cultivation, while others are perennial thugs that need serious intervention.
Annual Weeds to Look For:
- Chickweed – Small white flowers, loves cool weather
- Cleavers – Sticky stems that grab onto everything
- Groundsel – Yellow flowers, spreads quickly
- Fat hen – Diamond-shaped leaves, grows tall
Perennial Problem Weeds:
- Brambles – Thorny canes that root where they touch soil
- Bindweed – White trumpet flowers, twining stems
- Couch grass – Spreads through underground runners
- Dandelions – Deep taproots that regenerate if not fully removed
The key is learning to identify these early during your allotment assessment. Annual weeds are easier to manage, while perennial weeds need more strategic approaches. For detailed weed identification, the Royal Horticultural Society’s weed guide is an excellent resource with photos and management advice.
Assessing Overgrowth and Damage
When we first looked at our plot, we actually got quite lucky. While there were plenty of weeds and we discovered a large colony of ants, the condition wasn’t too bad overall. The front section had already been tarped by the previous tenant, so the earth underneath was ready to be tackled. Here’s what to look for when assessing overgrowth:
Signs of Neglect:
- Weeds taller than knee height
- Brambles establishing permanent territory
- Paths completely disappeared
- Any existing structures (greenhouses, sheds) being overtaken
Hidden Treasures:
Don’t assume everything needs removing during your allotment assessment. Look for:
- Established fruit trees or bushes
- Perennial herbs that might be worth keeping
- Good quality tools or materials left behind
- Existing water butts or composting areas
The Tarp Method: Clearing One Section at a Time
Rather than trying to tackle everything at once, we decided to work systematically. We’re using large tarps to cover sections of overgrown area, which kills back the vegetation naturally without chemicals.
This method works because:
- It blocks light, weakening perennial weeds over time
- It keeps the soil moist and workable underneath
- It allows you to focus on one manageable area at a time
- It’s completely organic and environmentally friendly
- Timing varies: 2-3 months in summer, longer in winter conditions
We started with the area closest to the gate – thankfully this section was already covered when we took over the plot. We’ve now covered the remaining sections with heavy-duty tarpaulin and will monitor progress over the coming months. The method works by blocking light and gradually weakening the vegetation underneath.
Dealing with Unexpected Visitors
Every allotment has its wildlife, but some visitors are less welcome than others. We discovered a thriving colony of red ants in one corner of our plot. While ants can actually be beneficial for soil aeration, red ants can be problematic if they’re farming aphids on your plants or creating large colonies in growing areas.
We’re researching holistic methods to manage them without harsh chemicals – something we’ll cover in detail in our upcoming post about natural pest control on allotments. For immediate organic solutions, Garden Organic offers excellent advice on wildlife-friendly pest management.
Creating Your Action Plan
Once you’ve assessed your plot, create a realistic timeline. Remember, this will vary greatly depending on your plot’s condition, the season you start, and your end goals:
First 1-2 Weeks: Assessment and Planning
- Measure your space accurately
- Identify major weed problems
- Note any existing useful features
- Plan your clearing strategy
Clearing Phase (varies significantly)
For plots in reasonable condition (like ours):
- Start clearing immediately in accessible areas
- Apply tarps to problem sections
- In the summer it may only take two to three months, in the winter it can take double that
- Annual weeds and grasses die in just 2-3 months during summer months
For heavily overgrown plots:
- If you have a lot of tough weeds underneath, it may take up to a year
- Tougher perennial weeds may need coverage for 6-12 months
- Some gardeners report taking the best part of 12 months before fully preparing all corners of their first plot
We’ve got lucky with our plot as the first section closest to the entrance was already covered, but we have now tarped the rest of the site and will wait for that to die back.
Soil Preparation (Ongoing)
- Many allotment owners cover beds they aren’t using in autumn and then uncover them come springtime
- Begin improving soil structure as sections become available
- Plan your first season’s crops based on cleared areas
- Set up basic infrastructure
Your timeline depends on:
- Season: In warmer areas, leave the sheet on for two to three months. In colder climates for at least three to six months
- Plot condition: Some plots have been pre-worked (like ours with existing tarps)
- End goals: Quick vegetable growing vs. long-term plot development
- Available time: Weekend warriors vs. daily tending
- Method chosen: Tarps take longer but require less labour than digging
Common Mistakes to Avoid
Don’t rush the clearing process. It’s tempting to hire a strimmer and attack everything at once, but this often creates more problems than it solves. Chopped-up perennial weeds can regenerate from small root pieces.
Don’t ignore the soil. While you’re focusing on clearing weeds, also consider what condition your soil is in. Compacted, waterlogged, or very sandy soil will need attention before you can grow successfully.
Don’t clear everything. Some wild areas can be valuable for wildlife and might contain useful plants you haven’t identified yet.
Next Steps: Building on Your Assessment
Once you’ve completed your initial allotment assessment and started the clearing process, you’ll have a much clearer picture of what you’re working with. This knowledge forms the foundation for everything else – from choosing what to grow to deciding where to put permanent structures.
Remember, every successful allotment starts with understanding what you’ve got. Take time to really get to know your plot before making major decisions. The patience you show during your allotment assessment will pay dividends throughout your growing journey.
The transformation from overgrown chaos to productive growing space doesn’t happen overnight, but with systematic assessment and clearing, you’ll be amazed at what’s possible.