Some of the links in this post may be affiliate links. If you decide to buy through them, it helps us grow Sprout Share.
Thank you for your support.
Keywords: soil preparation, no-dig method, digging vs no-dig, mulching allotment, beginner gardening UK
Soil preparation for beginners can feel overwhelming. You’ve finally got a patch of earth to grow your own, but now the big question looms… to dig or not to dig? One gardening friend insists you must dig the soil over thoroughly. Another swears by the no-dig method, while a neighbour suggests you simply mulch everything and let the worms do the work. As a new gardener in the UK, it’s easy to feel torn and overwhelmed by these conflicting approaches.
The truth is, each soil preparation method has its pros and cons, and what works best can depend on your soil, season, and the time or materials you have. You might be staring at a weed-filled allotment or a compacted garden bed and worrying if choosing the “wrong” method will doom your growing plans. Take a breath – every grower starts somewhere, and even the old hands debate dig vs no-dig. This guide will walk you through traditional digging, the no-dig method, and mulching, in plain language. By the end, you’ll understand which approach (or mix of approaches) could be best for your first growing season.
No matter which route you choose, one thing is certain: healthy soil is the foundation of a thriving garden. In fact, the National Allotment Society notes that learning how to build good soil is one of the most valuable skills a new plot-holder can develop. Soil prep isn’t just busywork – it’s an investment in your allotment’s future. Let’s dig in (or not!) and explore your options.
Traditional Digging: Pros and Cons of Turning Your Soil
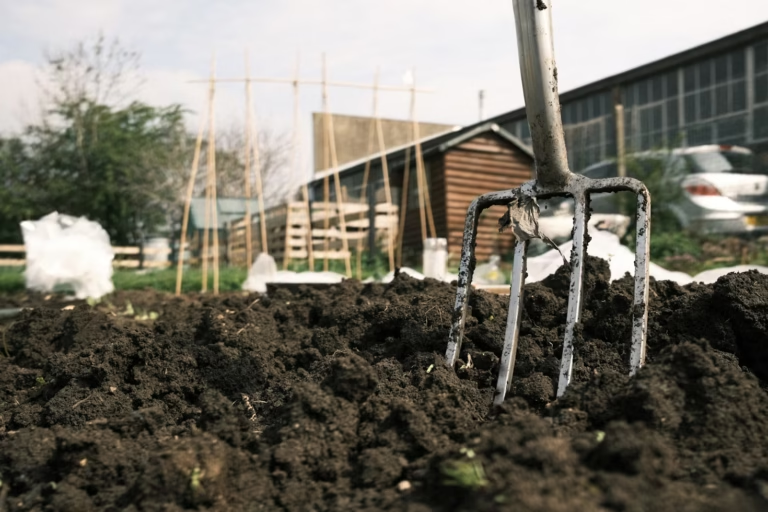
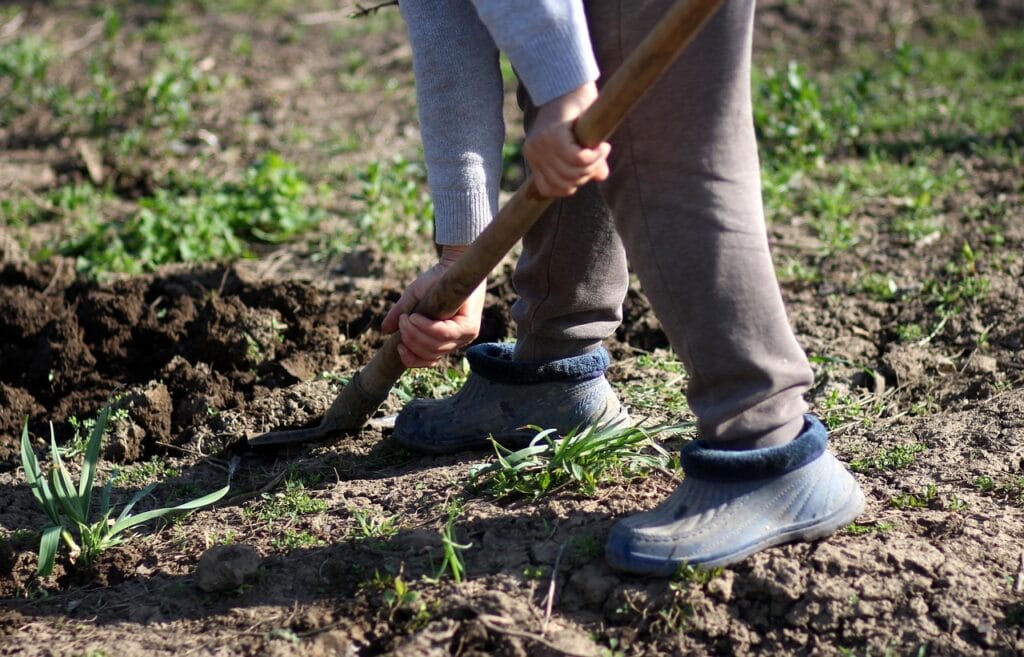
Digging is the age-old way British gardeners have prepared their soil. This means manually turning over the topsoil with a spade or fork, often referred to as “single digging” or “double digging” if you go extra deep. Why do it? Traditionally, gardeners dig to break up compacted ground, bury weeds and old crop debris, and mix in manure or compost quickly. Turning the soil also exposes insect pests to hungry birds (hence the robin that often follows the spade). Many new allotmenteers get advised to do an initial winter dig of their plot to get rid of weeds and loosen the soil for spring planting. After all, there’s something satisfying about seeing a patch of freshly dug, dark earth – it looks “ready.” If you’ve inherited a weedy, neglected allotment, digging everything over can feel like an immediate victory and a fresh start. Plus, it’s a chance to incorporate soil amendments in one go. For this job, a quality digging spade will be your best friend for slicing through soil and roots.
However, digging has some downsides that modern gardeners are increasingly aware of. It’s hard physical work – an afternoon of double digging will remind you of muscles you never knew you had. More importantly, frequent or indiscriminate digging can disrupt the complex ecosystem in your soil. An iconic British gardening writer once quipped that “only masochists” make heavy digging a constant gardening task, noting you dig mainly to aerate compact soil, bury weeds (or organic matter), and give the robins some breakfast – but digging no longer has the heroic status it once had. In other words, you shouldn’t dig just because grandad always did. Turning soil can damage soil structure if done when it’s waterlogged or if you overdo it. It also brings dormant weed seeds to the surface, where they’ll happily sprout a new generation of weeds. And all that exposure to air causes valuable soil carbon and moisture to escape; not ideal for sustainable gardening. Many UK gardeners now dig only when necessary (for example, to open up a new plot or break up heavy clay clods), and then switch to gentler methods. In short: digging works and is sometimes needed, but it’s not the only way to improve your soil. Take it easy, and remember that even the Royal Horticultural Society suggests digging can often be omitted or at least minimized in favour of other techniques.
The No-Dig Method: An Easier Way to Healthier Soil?
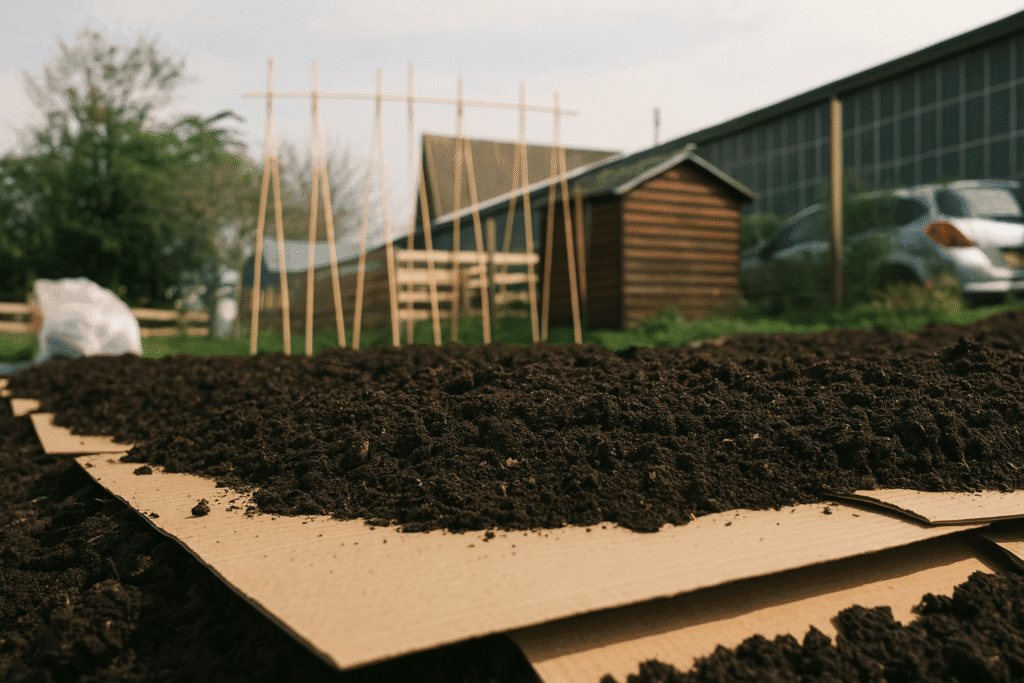
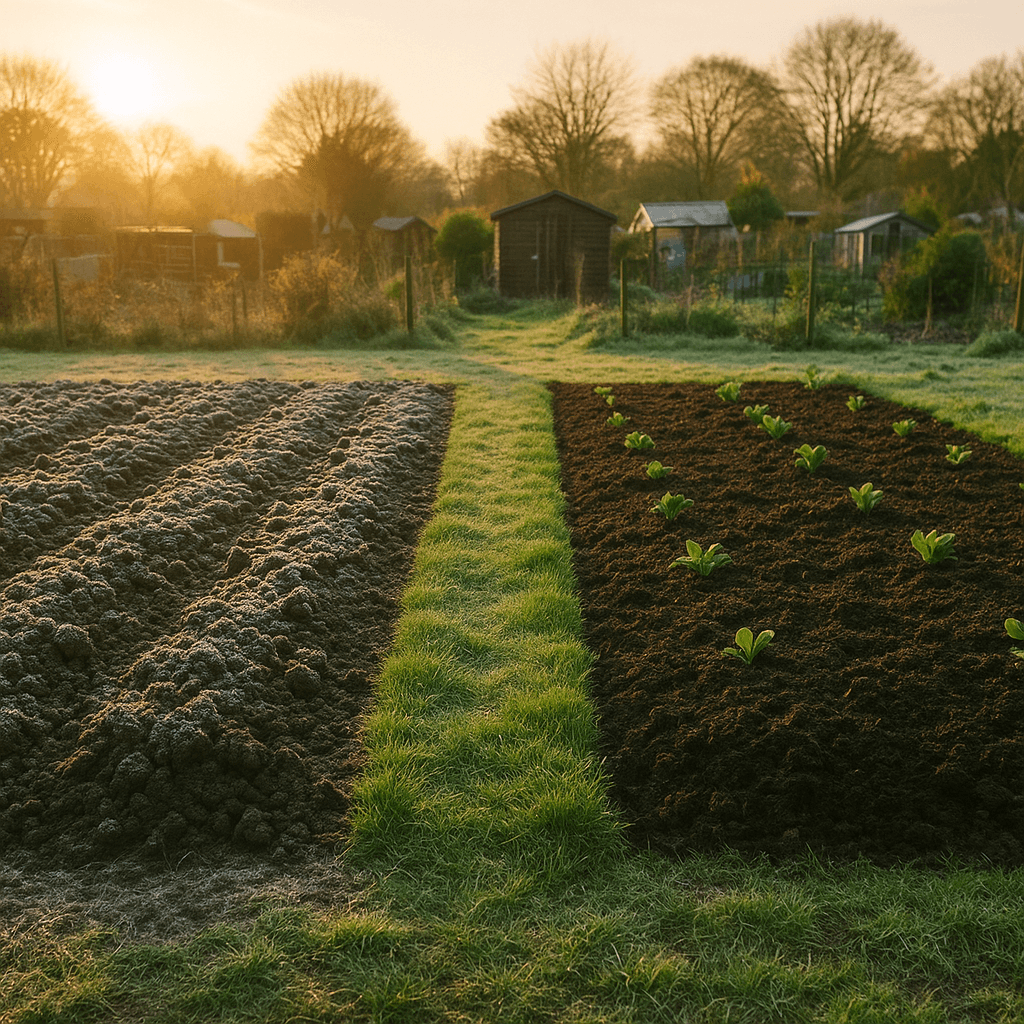
Imagine improving your soil without turning it upside down. That’s the promise of no-dig gardening. Instead of digging to remove weeds or mix in compost, you simply add organic matter on top of the soil and let nature do the work. Worms, microbes, and weather will integrate the compost or manure into the soil over time. Meanwhile, you keep the ground covered (often with compost mulch and cardboard or a membrane) so weeds struggle to germinate. The soil structure remains undisturbed – a bit like a forest floor where leaves constantly fall and rot into rich humus without anyone wielding a spade.
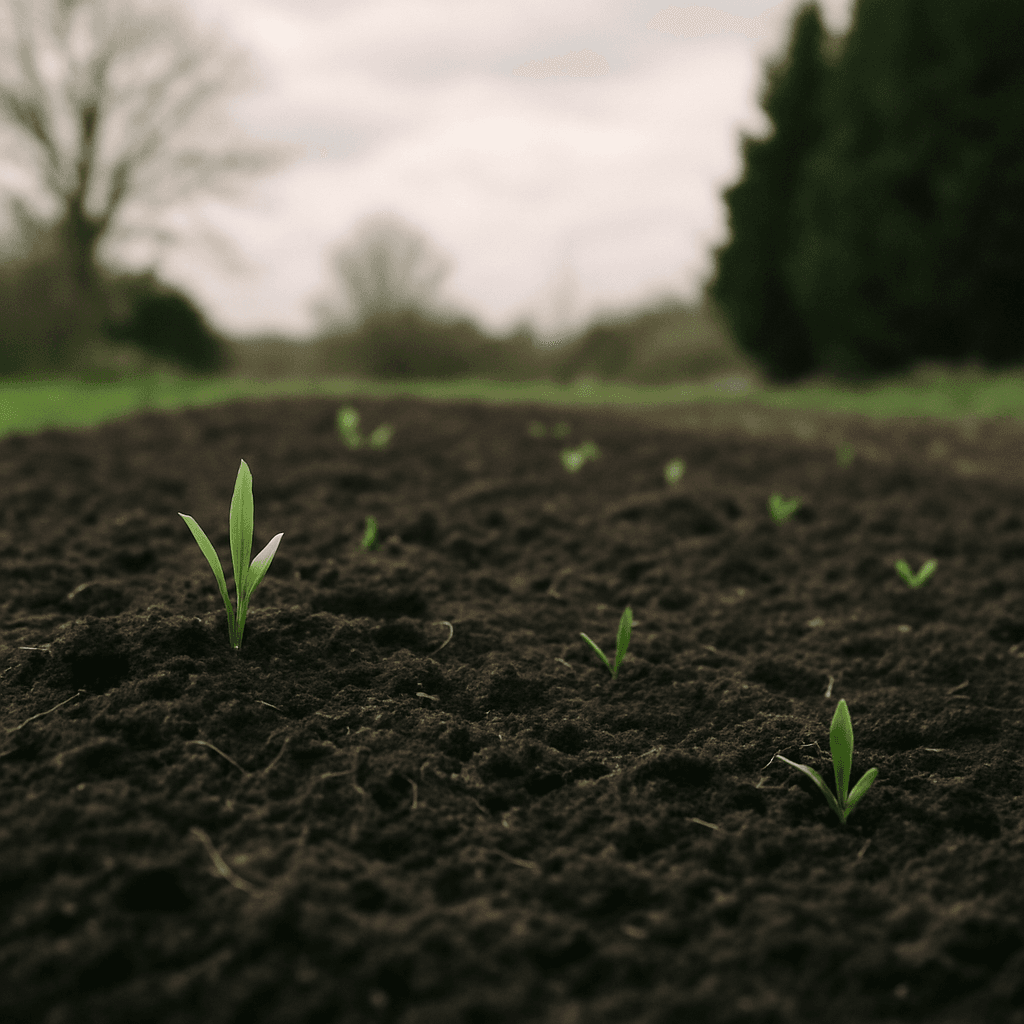
Why are so many UK gardeners excited about no-dig? First off, it can be a huge time and labour saver once it’s up and running. By not digging, you avoid a lot of heavy work, and you don’t keep uncovering new weed seeds. In fact, a well-mulched no-dig bed means far less weeding in the long. Many growers also find they don’t need to water as often, because the compost mulch preserves moisture in the soil. Perhaps most persuasively, side-by-side trials in British gardens have found no real drop in crop yields when switching to no-dig. In fact, some trials show no-dig beds producing bigger vegetable harvests than dug beds (with exceptions like potatoes. The idea that you can get the same or better results with less effort is a win-win for busy or older gardeners. And for those interested in soil health, no-dig is often recommended to boost soil life: all those worms and fungi that hate being chopped up by a spade are left in peace to do their beneficial work. As a bonus, keeping carbon locked into the soil (instead of releasing it as CO₂ by digging) is a small step toward climate-friendly gardening.
For beginners, the no-dig method can sound almost too good to be true, and indeed, it has its challenges. What do you need for no-dig? Mainly, a lot of organic matter. You typically start by smothering existing weeds with a light-blocking layer (for example, cardboard, or thick mulch) and then spread a generous layer of compost or well-rotted manure on top. To set up even a small bed, you might need several barrow-loads of compost. If you don’t have your own compost ready, sourcing it can be an upfront effort or expense. (Many new allotment holders order a bulk bag of compost or buy a large bag of manure to split with a neighbour.) Patience is key with no-dig as well. The soil ecosystem takes time to adjust. In the first season, you might still battle some persistent weeds poking through and find that your soil is firm (not fluffy). That’s normal. It can take a couple of seasons for a no-dig area to develop that beautiful, crumbly soil structure gardeners dream of. And while you won’t be digging, you’ll still do normal gardening tasks like planting holes or occasionally prying up a deep-rooted weed with a trowel. No-dig doesn’t mean never touching the soil at all; it just means you disturb it as little as possible.
Many UK growers swear by no-dig for its simplicity and the way it encourages a more ecological style of gardening. As one Garden Organic summary puts it, no-dig methods generally give similar yields to traditional digging but with a lot less effort and time spent on cultivation. For a beginner, that’s a tempting proposition! Just go in with realistic expectations: you’ll need enough compost or mulch materials, and a bit of faith in letting nature take its course. Over time, as you keep topping up your beds with organic matter, your soil can actually become richer and easier to work each year, all without ever lifting a spade after the initial setup.
Mulching Your Plot: When and How to Use Mulch
“Mulch it and leave it” is a common piece of advice in allotment circles. Mulching means covering the soil surface with a layer of material – usually an organic mulch like compost, leaf mould, straw, wood chips, or even grass clippings. In practice, mulching goes hand-in-hand with no-dig (no-dig gardens are essentially always kept mulched). But you can also use mulching as a technique on its own or alongside digging. Understanding mulch is key, because it’s like a multi-tool in gardening: the same simple step yields many benefits.
What does mulching do? A proper mulch will suppress weeds, conserve moisture, regulate soil temperature, and add organic matter as it breaks down. In the UK, mulching is often used to protect soil over winter or to prep a bed in autumn for spring planting. For example, if you clear a bed in October, you might spread a thick layer of garden compost over it and let that sit all winter – come spring, the worms have worked it in and the soil is in good heart for planting. Mulch is also used around growing plants (like placing compost or wood chips around fruit bushes or perennials) to keep the moisture in during summer and keep weeds down. The Royal Horticultural Society recommends applying mulch in mid- to late spring (before weeds germinate) and/or in autumn as plants die back. Essentially, get it on while the soil is moist and weed-free. One classic approach is to mulch in late winter after an initial weeding: this both feeds the soil and creates a barrier, saving you a lot of weeding and watering effort in the coming season.
The how is straightforward, but worth doing right. First, remove or cut down any big weeds so you’re not mulching on top of seeding dandelions or brambles that will poke through. Make sure the soil is moist (or water it) before mulching – you don’t want to trap dry soil underneath. Then spread your mulch material in a thick, generous layer. How thick? Experts suggest at least 5 cm (2 inches), and preferably around 7–8 cm (about 3 inches) deep for biodegradable mulches. If it’s too thin, many weeds will just push through. A good thick mulch smothers young weeds and also insulates the soil. Use whatever organic material you have: well-rotted manure, homemade compost, leaf mould, chipped bark, straw, etc., are all commonly used on UK allotments. Keep mulch a few inches away from the stems of plants (piling it right up to stems can invite rot). Over time – usually by next season – much of that mulch will have decomposed into the topsoil, improving its structure and fertility. Then you simply top it up again. It’s an ongoing cycle.
Mulching is one of the easiest improvements you can make, even if you do nothing else. If you’re short on compost, consider using autumn leaves (make a leaf mould pile or bag for later use) or ask your site neighbors if they have spare straw or manure. There are also bagged mulch products like straw pellets or cocoa shells, but simple local materials work great. Some allotmenteers buy bales of straw or bulk bark chips for larger areas. Just remember that organic mulches break down (that’s the point), so you’ll refresh them periodically. Also, be mindful that slugs love hiding under mulches like straw in damp weather, always a bit of a dance with nature! If slugs are a big issue, a compost mulch might be better than loose straw, or you can use wildlife-friendly slug deterrents alongside mulching. Overall, mulching is a gentle, forgiving approach: it’s hard to go very wrong with covering your soil. In fact, one UK study found that adding organic mulch around plants can save 20–40% of soil moisture compared to bare soil, and significantly cut down on weed growth – less watering, less weeding, more gardening for you.
Assessing Your Soil Before You Decide
Before you commit to any one method, it pays to get to know your soil. Every plot is a bit different. You might have rich loam that a fork slides into easily, or you might have heavy clay that could bend a spade! The approach you choose can be influenced by soil type and condition, so let’s do a quick assessment like seasoned gardeners do.
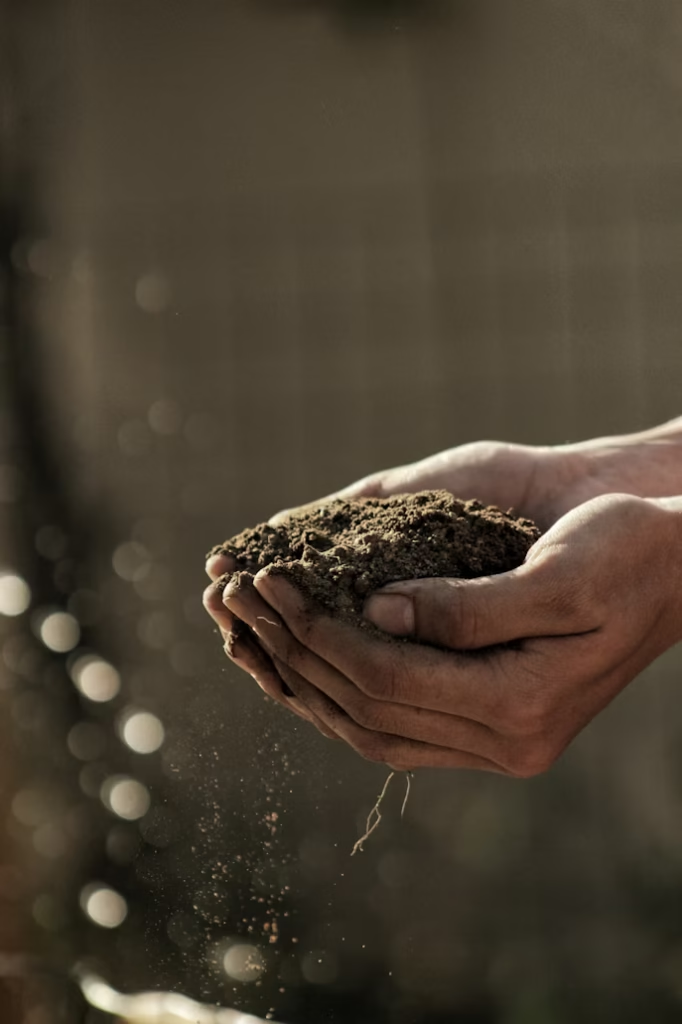
Start by digging a small test hole in your soil (about a spade’s depth) in a few places. What does the soil look and feel like? If it’s sticky, heavy clay that forms a ball in your hand, you’ll quickly learn why gardeners joke about “claggy” clay – it’s dense and can be waterlogged. At the other extreme, if it’s very sandy or gritty and falls through your fingers, you have free-draining soil that can dry out and lacks nutrients. Most people have something in between (like clay loam or sandy loam). The point is to identify any extreme: a very clayey or very sandy soil often needs extra organic matter. The National Allotment Society advises beginners to do exactly this: dig a small hole and test your soil’s drainage and texture – heavy clay or very sandy soil will likely need plenty of added organic matter to improve it. Knowing this upfront can guide your prep. For instance, no-dig gardening adds loads of compost routinely, which is great for both sandy and clay soils. Traditional digging can help break up clay in the short term, but without adding compost, the clay will compact again. So if you discover “yep, it’s clay,” you know that whichever method you use, incorporating organic matter (by digging in manure or by mulching on top) is key.
Also take note of your soil’s current health: Is it full of weed roots or bindweed rhizomes? Is it bone-dry dust or is it sour-smelling and waterlogged? These give clues. Lots of perennial weed roots (couch grass, bindweed, nettles) might sway you to do an initial dig to remove those tough roots, because otherwise they’ll keep sprouting through a mulch. Smelly, compacted, waterlogged soil could mean poor drainage. Raised beds or some initial digging to open it up might help. If the soil is in decent shape (say, previously cultivated and just weedy on top), you have the freedom to go no-dig immediately by mowing weeds short and mulching over them. Consider doing a soil pH test as well – a simple home soil test kit will tell you if your soil is acidic, neutral or alkaline. Most veggies are fine in neutral to slightly acidic soil, but if you found, for example, very acidic soil, you might plan to dig in lime during winter (a traditional technique). This isn’t common on allotments, but a quick pH check can be useful context.
Remember, soil can vary even across a small plot. One end might be higher and drier; another corner might be boggy. If you find an area that’s consistently waterlogged, you may want to hold off planting there and improve drainage (one method is to double dig or install drainage or simply plant water-loving crops in that spot). On an allotment, also look out for any signs of previous cultivation; bits of compost, old crop remains, or different soil layers. Sometimes you’ll find an old compost heap site (black crumbly soil – lucky you!) or the opposite, a spot that seems stripped of topsoil. All these observations will help you make an informed choice. As the saying goes, “know your soil, know your plan.” The more you understand what you’re working with, the easier it is to pick a prep method that sets you up for success.
Soil Preparation for Beginners: What Most Gardeners Start With
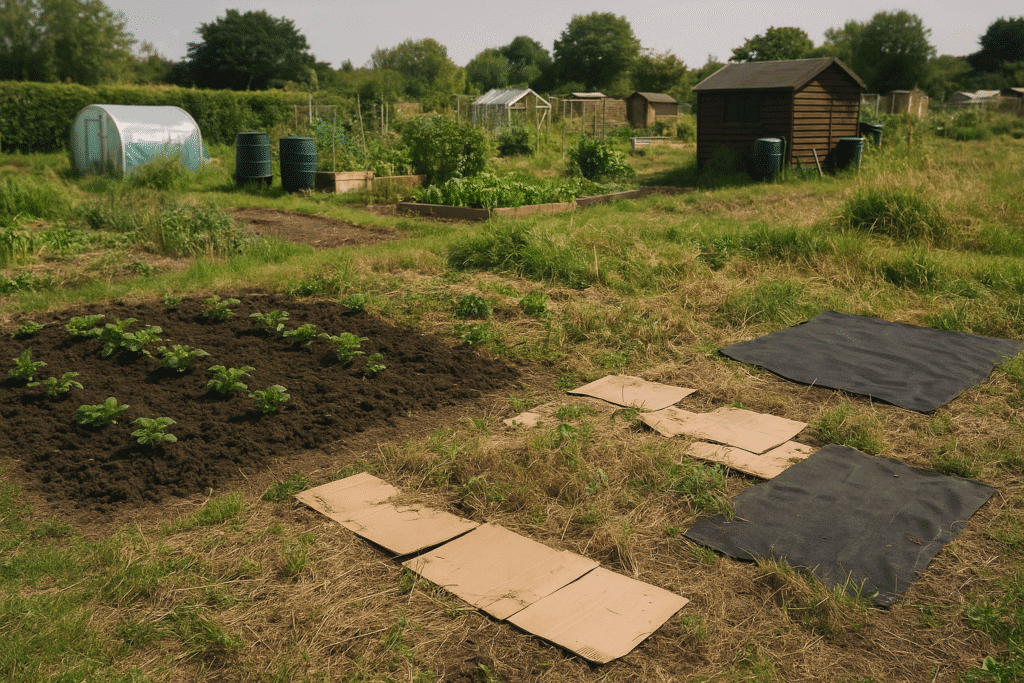
If you’re still not sure which way to go, it might help to know what many other beginner gardeners actually do. From allotment forum chatter to RHS advice for newcomers, a pattern emerges: start simple and adapt as you learn. In practice, that often means using a bit of both digging and mulching in the first year. For example, a very common approach for a new allotment is to clear and dig over one manageable section of the plot for immediate planting, and cover the rest with cardboard or a tarp to tackle later. This way, you get a quick win (some ground ready to grow in) without exhausting yourself on day one. The National Allotment Society itself advises new plot holders: it’s better to clear and prepare a small area well than to try to tame the whole plot at once. By digging or thoroughly weeding a starter patch, you can plant a few things and taste some early successes. Meanwhile, mulch or cover the untouched areas (with organic mulch, cardboard, or a weed membrane to suppress the jungle until you’re ready to expand. This hybrid strategy is often the most practical for beginners, and it sets you up to experiment with no-dig on the covered sections later if you want.
Many beginners, perhaps encouraged by long-time plotholders, do begin with traditional digging on at least part of their plot. It’s the classic rite of passage: turn that soil, pick out the biggest weeds, and feel like an allotment gardener! In UK allotment culture, there’s even a tradition of planting potatoes as a first crop in newly turned ground. Potatoes are forgiving and their vigorous growth can help break up clods of soil. (Plus, earthing up potatoes forces you to loosen soil around them.) It’s often said that “potatoes clean the soil” – not literally, but they do encourage you to dig and disturb the soil in the process of harvesting, which can combat weeds. Great beginner crops like potatoes are popular because they’re both easy and useful for soil conditioning. Don’t be surprised if an old hand on the site suggests, “Get some spuds in; they’ll break up that hard ground for you.” This is common advice and not without merit if your soil is quite compacted. Using a basic fork to gently turn the soil and sow a row of potatoes is a straightforward task to start with.
On the other hand, an increasing number of first-timers are keen to try no-dig from the get-go. You might have seen YouTube videos or books by UK no-dig champions (like Charles Dowding) and feel inspired to avoid digging entirely. Plenty of beginners do succeed with an immediate no-dig approach. Especially if their plot isn’t horrendously overgrown or if they have access to lots of compost. A pragmatic path some take is to dig out the really tough perennial weeds first (like big bramble roots or couch grass patches), then set up no-dig beds. This way, you invest a bit of effort upfront on the worst offenders, and then let mulch handle the rest. It’s not “pure” no-dig, but it’s a smart compromise that acknowledges reality (some weeds laugh at a 5cm mulch layer, unfortunately).
From various community discussions, one thing is clear: there’s no one-size-fits-all. Beginners often start with what they have and what makes sense for them. If you have a load of cardboard and a local stable offering free manure, no-dig with mulching might be a no-brainer to try. If you have mainly hand tools, no wheelbarrow, and an extremely overgrown plot, you might find a bit of digging and weeding by hand in small sections is more doable at first. Both paths are valid. And crucially, you can change course next season. Many gardeners who start off double-digging later convert to no-dig once their circumstances allow, and some who try no-dig might decide to do an occasional digging when re-shaping beds or rotating crops. As a beginner, give yourself permission to learn by doing. You’ll soon find what feels right for you. For many new growers, soil preparation for beginners often comes down to confidence, consistency, and making the best use of what’s available
Tools and Materials You Might Need
Each soil prep approach uses a slightly different toolkit. Let’s quickly go through what you’ll likely need for digging, no-dig, and mulching, so you can plan ahead (and perhaps budget a bit – though you don’t need to spend a fortune).
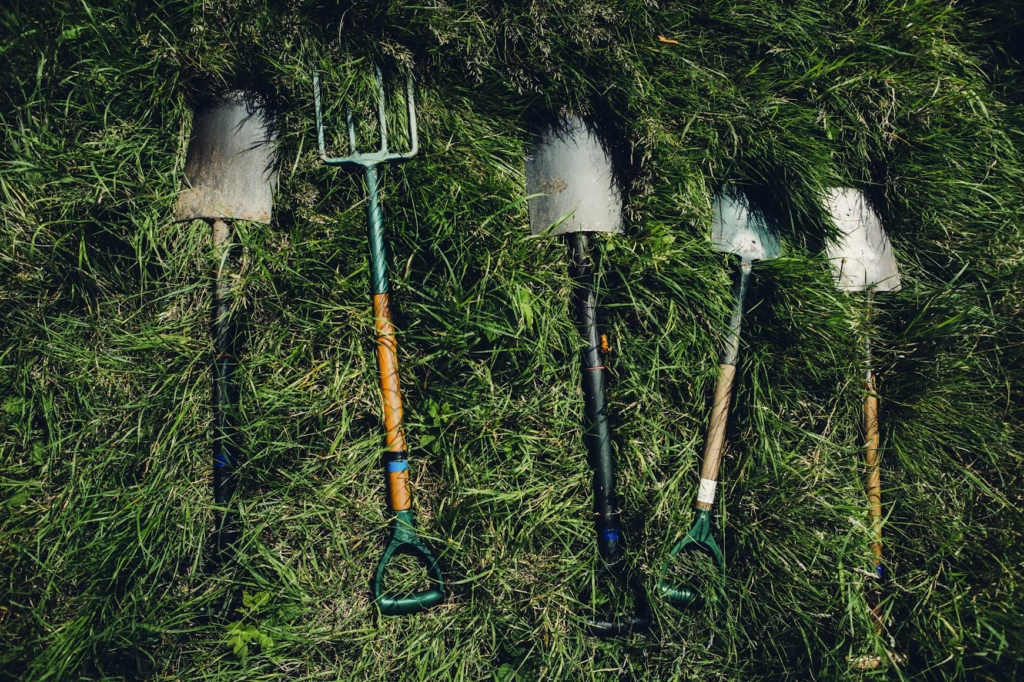
For traditional digging, the essentials are simple: a good spade and fork. The spade is for slicing through soil and turning it over; the fork is excellent for loosening compact areas and lifting out weeds without cutting their roots clean through. The RHS recommends a basic set of digging tools as part of any new gardener’s kit – typically a spade, fork, hand trowel and hoe. You don’t need fancy gadgets, but do invest in sturdy, comfortable tools. A digging fork with a solid handle can make breaking up clay or prying out weeds much easier than a spade alone in some soils. If your plot is large or you’re dealing with hard ground, some people consider mechanized help (like a rotavator tiller), but be cautious – those can churn up weed roots into bits and actually increase weed problems if used recklessly. Most beginners skip machinery and just do a bit at a time manually. Other handy tools for digging include a hoe (great for skimming off annual weeds on the surface) and a rake for leveling and creating a fine seedbed after digging. But you don’t need to buy all at once; start with the basics and see what you actually require as you go.
For no-dig and mulching methods, your focus is on sourcing materials and moving them around. The hero tool of no-dig might just be the wheelbarrow – you’ll be shifting loads of compost, manure, wood chips, etc., to your beds (Some even tip out for ease!). If your site doesn’t have vehicle access, be prepared to ferry materials in by barrow or trug. A strong wheelbarrow can save your back when moving heavy compost or bulky manure. Additionally, a garden fork or broadfork can be useful in no-dig for one-off loosening if needed (for example, if a patch is very compacted, some no-dig gardeners lightly aerate with a fork without turning the soil). But in principle, you won’t be digging much. Tarps or cardboard are also part of the no-dig toolkit – used to cover areas and kill weeds by excluding light. You might scrounge cardboard from appliance shops (ensure it’s free of plastic tape/staples) or use weed-suppressant fabric for this purpose. Having a sharp knife or pair of scissors is handy to cut cardboard or fabric to shape. When it comes to the mulch materials: a shovel or large scoop will help you load compost into the barrow, and a rake can help spread mulches evenly. Don’t forget a good pair of gloves and maybe a dust mask if you’re handling dry composted manure or dusty straw, just for comfort and safety.
Other useful materials across all methods include organic matter (compost, manure, leaf mould – the lifeblood of soil improvement) and possibly soil amendments like lime or fish/worm castings if your soil needs a nutrient boost. Most beginners won’t need many amendments if using plenty of compost. Water access (a hose or watering can) is important too – if you’re digging, you might moisten the ground a bit first to make it easier; if you’re mulching, you’ll water plants through the mulch as needed. One more tool to consider is a soil knife or weed remover tool for popping out deep roots (especially if you’re going mostly no-dig, you’ll occasionally resort to spot removal of a nasty weed). But again, you can start minimal.
An encouraging note: you can often borrow or find tools second-hand. Many allotment communities have a shed of old tools or someone with a spare fork to lend. When you’re just starting, focus on the core items: something to dig with, something to carry stuff with, and something to cut weeds/light (or cover them). The rest can come with time. The goal is to make your soil prep as easy as possible given your method – good tools and materials are there to save your labour and improve the outcome. With the right basics on hand, you’ll feel much more confident facing that plot for the first time.
When Each Method Works Best (Season and Soil Tips)
Now that we’ve broken down the methods, you might be wondering if there’s a right time or situation for each. Indeed, timing and soil conditions can make one approach shine over the others.
Seasonal timing: Traditionally, digging (especially deep digging) is a task for autumn or winter in the UK. There’s a classic image of gardeners doing the “winter dig” in a crisp January morning, turning over their veg patch to let the frost work on the clods. There’s truth in this; clay soils in particular benefit from autumn digging, because winter frosts help break them into a nicer structure by spring. However, modern advice suggests not to rush to dig in early winter if you don’t need to. In fact, the RHS now says late winter or early spring can be better for digging, as it avoids nutrient loss over winter and you can dig right before planting. The key is to avoid digging when soil is waterlogged or frozen (doing so can harm soil structure). Aim for a window when the soil is workable. Typically after a few dry days but while it still has some moisture. For no-dig and mulching, autumn is ideal to set things up: you can lay cardboard and mulch in late autumn and let it sit over winter. This timing means by spring the weeds underneath are dead or weakened, and the soil has warmed earlier (undisturbed soil under mulch often stays a bit warmer). Spring is also fine for no-dig – many start in March by just mulching and planting straight away – but you’ll need to ensure weeds are taken care of (either by hand removal or a thick enough cardboard layer under compost). Mid-spring mulching (April-time) is great for top-dressing around perennials or prepping beds that had winter crops, as it locks in moisture before summer. Summer isn’t a typical time to start no-dig on a large area simply because materials (and time) can be lacking and it’s peak growing season, but you can certainly keep mulching through summer as needed (like straw mulch around strawberries or tomatoes to keep moisture in).
Soil type and condition: As hinted before, soil type can influence your strategy. If you have very heavy clay soil, you might benefit from an initial digging to open it up and incorporate grit or compost, especially if it’s compacted. Some gardeners with clay do a deep dig once (sometimes even double-digging one time) to break a hardpan, and then switch to no-dig mulching thereafter so it doesn’t re-compact. On clay, mulches are extremely helpful to prevent the surface from baking hard in summer or getting waterlogged in winter. No-dig works on clay, but be patient: worms will improve a clay soil if you keep feeding them compost. If your soil is light and sandy, digging is rarely needed – it’s already loose. In fact, digging sandy soil too much just dries it out. An old gardening rule is that light (sandy) soils can often be left undug – just mulch heavily to add organic matter and prevent moisture loss. For sandy land, no-dig is a natural fit because it keeps adding humus on top which that kind of soil desperately needs. As Anna Pavord notes, on a light, well-drained soil you could grow a great garden without ever digging, so long as you mulch liberally to maintain fertility.
Consider also what you plan to grow. If you are sowing a lot of fine seeds (carrots, parsnips, salad mix) directly in the ground, you will need a fine seedbed – which usually means at least raking the soil well. Some no-dig gardeners sieve their top layer of compost to get a fine tilth for sowing, or they’ll hoe lightly. If you find your undug, mulched soil is a bit lumpy when sowing time comes, you might do a shallow fork or rake just to get a nice surface. There’s no shame in that – you’re not betraying no-dig principles by lightly cultivating the top inch for sowing seeds. Conversely, if you mostly transplant seedlings or grow potatoes, an undug bed is usually absolutely fine. In fact, as Pavord mentioned, the no-dig method works great for permanent plantings (like fruit bushes or asparagus) and for crops you plant as transplants (like tomatoes, brassicas, leeks) or tubers. Those don’t need a powder-fine soil tilth; they appreciate the undisturbed soil beneath. But for a carrot seedbed, a thick mulch might get in the way – you’d typically pull back the mulch or use a thinner layer of compost that you can make into a seed drill. If you know you want to grow root vegetables by direct sowing, you might lean towards a bit of traditional soil cultivation (or at least very well-prepared topsoil). Some gardeners do a combo: keep no-dig beds for most things but maintain one small bed where they dig or at least fully till the soil to grow carrots and parsnips each year for reliability.
Special cases: If your plot suffers from certain issues, one method might be a quicker fix. Example: compaction. If water puddles on your soil and it’s like concrete beneath, an initial thorough digging (or even double-digging) might be required to jump-start its recovery. You could also plant a green manure like oilseed radish or alfalfa to bust through compact layers with their roots (an excellent organic alternative). If you have weed infestation (couch grass, bindweed, brambles galore), a no-dig approach will eventually kill them if done strictly (cardboard + compost, and time). But many gardeners in that situation choose to dig out as much of those tough roots as possible first, because it speeds up the reclaiming of the plot. On the flip side, if your soil is reasonably clean but just poor quality, mulching and no-dig composting can rapidly improve fertility without any need to dig. Wet plot? If you’re on a marshy site, raising the soil level with heaps of compost (no-dig raised beds) might be far better than trying to dig trenches (which could just fill with water). Slope or erosion-prone? No-dig shines there because you’re not disturbing soil (which can wash away in heavy rain).
So, think of digging, no-dig, and mulching as tools in a toolbox. Use the one that fits the job and conditions. You may dig one clayey bed to plant your parsnips but use no-dig mulching on the bed where pumpkins will sprawl. You might dig in manure on the patch where you’ll put hungry potatoes, but leave the rest mulched. As you tune into your garden’s seasonal rhythm, you’ll deploy methods more strategically. By late autumn, for example, you might decide, “I’ll mulch these three beds and let worms work over winter, but that bed I’ll single-dig because it had a pest issue and I want to expose the soil.” With experience, you’ll know when to dig, when not to, and when to just cover up. There’s a season for everything in gardening.
Beginner Q&A
Q: Can I mix these methods on my allotment?
A: Absolutely. In fact, many UK gardeners do a hybrid approach, especially in the first year. You might dig over an area that needs quick planting or has big perennial weeds, but use no-dig mulching on other areas that you’re not ready to cultivate yet. There’s no rule that you must be 100% one method. For example, some growers dig their potato beds (since harvesting potatoes involves digging anyway) but keep the rest of the plot no-dig. Or you might try no-dig on half the plot as an experiment while double digging a particularly compacted section. Over time, you can compare results and gradually choose the method that you prefer. Mixing methods is often very practical. Dig where you must, mulch where you can. The plants won’t mind, and you’ll learn what works for your situation. Many beginners report success doing a bit of both: digging a little when planting something like a fruit tree (where you need a hole), but otherwise mulching beds for easier maintenance. Think of it as tailoring to each bed’s needs. Your garden, your rules!
Q: If I choose no-dig, does that mean I should never use a spade at all?
A: Not at all. “No-dig” really means “no routine cultivation digging.” You will still use a spade or trowel for specific tasks; digging a hole for a shrub, lifting potatoes, edging a plot, or removing a deep root here and there. The idea is to minimise turning the soil broadly. It doesn’t mean you can’t pop a spade in when needed. No-dig veterans often say they choose their digs. For instance, if couch grass has invaded a corner, they might dig out that section’s rhizomes to get a clean start, then resume no-dig mulching. Also, normal gardening like transplanting seedlings involves a bit of digging (a small hole for each plant). That’s fine. No-dig is about avoiding the habit of full soil turning each season. So don’t worry, you don’t have to throw away your spade, just repurpose it for targeted uses.
Things That Often Go Wrong (And How to Avoid Them)
Learning soil prep is like any skill, you’ll likely make a few mistakes along the way. Here are some common pitfalls beginners face, and how to sidestep them:
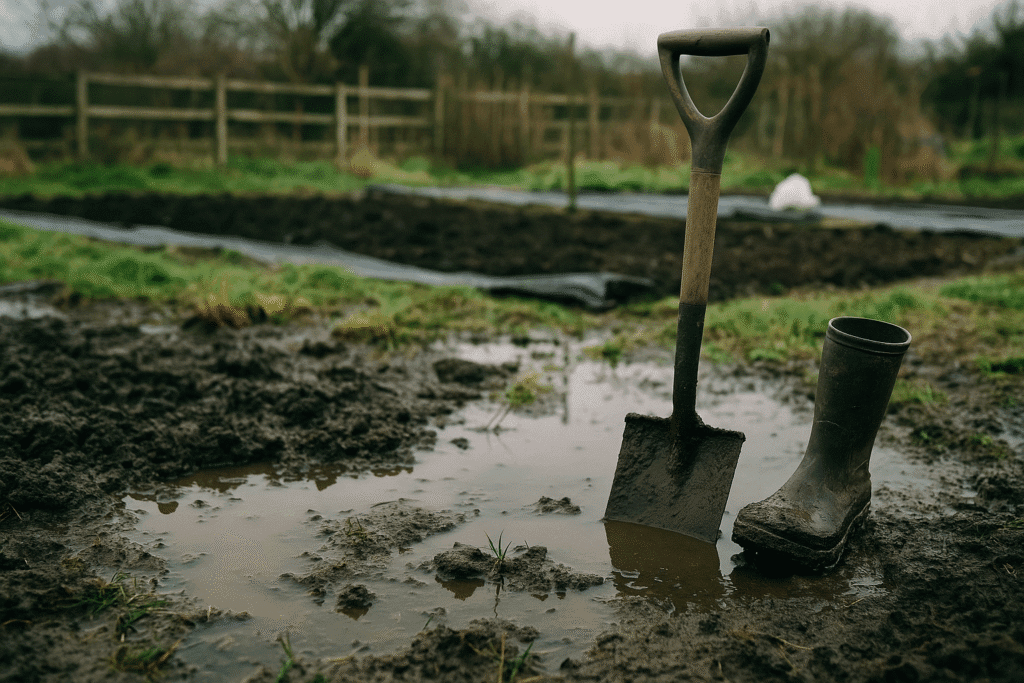
Digging at the wrong time: It’s a classic error to enthusiastically dig your plot when the soil is too wet. What happens? You end up with clumpy, smeared soil that dries into hard lumps; not fun to plant into. Or you dig in a frost and end up chilled to the bone with not much to show. Remember to avoid working soil that’s waterlogged or frozen. If the soil is sticking heavily to your boots or spade, it’s too wet to dig, wait for a drier spell. Conversely, digging bone-dry soil in summer is back-breaking and pointless (it’s like chopping at bricks). Aim for that Goldilocks condition: moist but not soggy. If you must work in less-than-ideal conditions, do minimal cultivation and add organic matter to help structure.
Skimping on mulch thickness or materials: A thin scattering of mulch won’t stop weeds, they’ll grow right through it. Beginners sometimes spread compost too sparingly (understandably, if it’s limited). The result is disappointment when a flush of weeds appears. If you’re mulching to smother weeds, be generous and thorough. Also overlap cardboard pieces well (if any gaps of light reach weeds, they will exploit it!). Another mistake is using mulch that introduces problems, e.g. fresh manure or grass clippings with weed seeds. Always use well-rotted manure/compost for mulching, or you might inadvertently plant a new weed garden. If using straw, be aware it can shelter slugs; be prepared to check under it or avoid straw if slugs are rampant. Essentially, commit to the mulch method properly: right material, right depth, right timing (over moist, weed-free soil). That will set you up for success.
Not removing perennial weeds (or at least weakening them): If your plot is full of tough weeds like brambles or bindweed and you simply layer compost on top, those brambles may just find the light at the edges and keep coming. A common regret is “I wish I’d cut/damaged those bramble crowns before mulching” or “I should have dug out that big nettle clump first.” You don’t have to get every last root, but do address the big perennial offenders. Cut them to ground level and, if possible, root them out with a fork or spade. In no-dig, people often cover these spots with extra cardboard or even a double layer. You can smother perennials over time, but if you help the process by chopping them back hard or digging the worst bits, your mulch will have a much easier job.
Overdoing it early on: This is more of a human mistake than a soil mistake. New gardeners sometimes go at their plot like it’s an Olympic event. Dig the entire thing in a weekend, or spend hundreds on imported compost overnight. This often leads to burnout, injury, or simply biting off more than you can chew. Soil prep is important, yes, but it doesn’t all have to happen in one go. Pace yourself and don’t feel you need to double dig to 2 feet deep everywhere (in fact, you usually shouldn’t). It’s perfectly fine to prepare one bed well and plant it, while other areas wait under cover. There’s a saying, “the best fertiliser is the gardener’s shadow.” Meaning just being present and attentive in your garden is more valuable than brute forcing things. Take your time, do a bit each week, and let the soil improvement be an ongoing process. Rome wasn’t built in a day, and a healthy allotment soil isn’t either.
Walking on the soil after prepping it: You spend hours loosening and fluffing up the soil, only to compact it again by stepping all over it while sowing or weeding. Try to avoid treading on your beds once dug or mulched. Use planks to distribute weight if you must step in, or better, design narrow beds you can reach from the edges. This is a mistake you might not realize you’re making – many beginners (myself included) have cheerfully dug a bed and then left foot-shaped indentations all through it when planting. It undoes some of your hard work. If you mulch/no-dig, this is less of an issue because the soil below stays firm and you usually maintain paths. In traditional digging, just be mindful to treat the soil gently after you’ve prepared it.
If any of these mistakes happen, don’t panic. Soil is remarkably forgiving and resilient. Even compacted soil can be remedied with time and organic matter. Weeds always come back a bit, just keep at them. Each season you’ll improve your technique. Remember, every gardener, even the experts, were beginners once and have their own trial-and-error stories. As long as you’re observing and learning, there really are no failures – only experiments that teach you what your soil likes and dislikes. And when in doubt, ask your neighbouring gardeners for tips; they’ve likely “been there, done that” and can save you a headache or two with a friendly word of advice.
Conclusion
So, should you dig, no-dig, or mulch? By now you’ve seen that there’s no single “correct” answer. It depends on your soil, your time, and your gardening philosophy. The wonderful thing about gardening is that it’s an ongoing learning journey. You might start by digging over a couple of beds this year, then decide to switch to compost mulching as you discover how rich and alive your soil becomes. Or you might embrace no-dig from day one and never look back (except to admire how few weeds you have!). Whatever you choose, know that you’re not ruining your garden if you try one method and then change course. Soil is forgiving and remarkably responsive once you start caring for it.
The biggest takeaway is that building healthy soil is a marathon, not a sprint. Whether you’re turning compost in or layering it on top, you are feeding your soil’s future. Keep adding organic matter, avoid unnecessary disturbance, and nature will reward you with fertility underfoot. Also, be patient with yourself. The first season on a new allotment or garden can feel like a lot of work with perhaps modest results. But each task you do – a bit of digging here, a bit of mulching there – is laying the groundwork for easier and better growing down the line. Don’t be afraid to start small. Maybe prepare one bed well and get a crop of salad or beans in, rather than exhaust yourself perfecting the whole plot at once. Small successes will boost your confidence.
Importantly, enjoy the process. There’s a simple pleasure in working with soil, whether you’re the type who loves the physical workout of digging or you prefer the calm of quietly spreading compost and letting worms handle the rest. Both can be meditative in their own way, a chance to disconnect from stress and reconnect with the earth. Studies and countless personal stories have shown that tending soil and plants is great for mental wellbeing, providing calm and a sense of purpose. On the allotment, you’ll also find a community of fellow growers who are usually more than happy to share their soil secrets (and probably an opinion or two on digging vs no-dig!). Tap into that community knowledge; it’s like a local encyclopedia suited to your exact plot conditions.
Finally, remember that every gardener’s soil journey is unique. Your patch of earth is yours to nurture. Take pride in the improvements you make, however small. Maybe this year you dig in some manure and the soil is a bit softer; next year you try mulching and earthworms appear in droves. It all adds up. And if you ever feel stuck, we’ve got plenty more resources to help you. We explain more about clearing an overgrown plot and improving soil step-by-step in our guide to assessing a new allotment (see Useful Links below for our SproutShare article on allotment preparation). Soil preparation for beginners doesn’t need to be perfect, it just needs to start. Every season is a new chance to improve, experiment, and grow.
Tools Mentioned:
More from SproutShare:
How to Assess Your New Allotment: A Complete Guide to Getting Started – Our detailed beginner’s guide on clearing and understanding a new plot (soil assessment, weeds, and first tasks).
Allotment Layout Planning: Proven Steps for Maximum Yield – Tips on designing your plot’s layout and beds once your soil is prepared, to make the most of your space.
Organic Pest Control: 7 Natural Methods – Learn how to handle common allotment pests organically, by building a healthy garden ecosystem (goes hand-in-hand with soil health).