Some of the links in this post may be affiliate links. If you decide to buy through them, it helps us grow Sprout Share.
Thank you for your support.
Keywords: first allotment, allotment for beginners, new allotment plot, allotment getting started, beginner gardening, UK allotment, what to do first allotment, allotment first week tasks, new plot holder guide
You’ve done it. After possibly years on a waiting list, you’ve finally got the keys to your first allotment plot. The excitement is real, but so is that overwhelming feeling as you stand there looking at what might be a tangle of weeds, a pristine patch of earth, or something in between.
We understand that mix of joy and “where do I even start?” because we’ve all been there. Whether you’re starting in January or mid-season, your first week sets the foundation for everything that follows. While you’ll want to think about your allotment layout planning for maximum productivity later, let’s first walk through the seven essential tasks that will help you transition from new plot holder to confident grower.
1. Survey and Document Your Plot
Before you touch a single weed or move any soil, take time to properly assess what you’re working with. This isn’t just about making a mental note, we’re talking about creating a proper record that will guide your allotment getting started decisions for months to come.
Walk the entire perimeter of your plot, noting its size, orientation, and any existing structures. Most standard allotment plots are around 250 square metres, but sizes vary significantly across the UK. Take photos from multiple angles, especially if you’re inheriting established beds, fruit trees, or structures like sheds or greenhouses.
Check which areas get the most sun throughout the day. South-facing plots typically receive the most light, which is crucial for most vegetables, while north-facing areas might be better suited for leafy greens or composting. Note any boggy areas, slopes, or spots where water collects.
Document any existing plants, even if they look like weeds. Some of what appears to be unwanted growth might actually be established herbs, perennial vegetables, or beneficial plants that previous tenants left behind. A mature rhubarb crown or established fruit bushes are valuable assets worth planning around. The RHS Plant Identifier can help you identify unfamiliar plants.
Check the soil quality by digging small test holes in different areas. Is it clay-heavy, sandy, or loamy? Note any areas with compacted soil or obvious drainage issues. This initial assessment will inform everything from your first planting decisions to long-term infrastructure planning.
2. Introduce Yourself to the Allotment Community
Allotments are inherently social spaces, and your fellow plot holders are your most valuable resource when allotment getting started. Experienced neighbors can help you avoid common pitfalls while sharing decades of site-specific knowledge.
Make an effort to introduce yourself to adjacent plot holders and anyone you encounter during your first visits. Most allotment communities are welcoming to newcomers, especially those who show genuine interest in learning and contributing to the communal atmosphere.
Ask about plot-specific challenges like drainage issues, pest problems, or microclimates that might affect your growing plans. Experienced neighbors often know which varieties thrive in your local conditions and can warn you about common mistakes. They might also have insights about shared resources like water points, tool storage, or communal composting areas.
Many allotment sites have informal social structures; perhaps a WhatsApp group, regular coffee mornings, or seasonal social events. Getting involved in these community aspects makes the entire experience more enjoyable and provides ongoing support as you develop your growing skills. The National Allotment Society offers guidance on building allotment communities and can connect you with local groups.
Don’t be shy about asking questions. Most seasoned allotment holders remember their own beginnings and are happy to share advice. This community knowledge is often more valuable than any gardening book, as it’s specifically tailored to your exact growing conditions and local challenges.
3. Understand Your Site’s Rules and Resources
Every allotment site operates under specific rules and guidelines that govern everything from what you can grow to how you maintain your new allotment plot. Your first week should include a thorough review of these regulations and an exploration of available resources.
Contact your local council or allotment association to obtain a copy of the site rules. These typically cover permitted structures, maintenance requirements, water usage, and any restrictions on certain plants or practices. Some sites prohibit certain plants like bamboo or have specific requirements about hedge heights and path maintenance. Find your local council through the government website to access allotment-specific regulations.
Locate and familiarize yourself with essential infrastructure. Find water points and understand any associated costs or usage restrictions. Identify waste disposal areas, composting facilities, and any communal storage spaces. Some sites have shared tool storage, group buying schemes, or communal areas for socializing.
Understanding your responsibilities as a new plot holder prevents future conflicts and ensures you contribute positively to the site community. Many sites require plots to be actively cultivated and maintained to a certain standard, with penalties for neglect.
Check if your site participates in any group purchasing schemes for seeds, compost, or other supplies. These collective buying opportunities can significantly reduce your costs while ensuring you get quality materials suited to your local conditions.
4. Create a Basic Water Management Plan
Water access and management are crucial for your first allotment success, particularly as climate change brings more unpredictable weather patterns to the UK. Your first week should include developing a practical approach to watering that works within your site’s constraints and your personal schedule.
Assess your plot’s water sources and any associated costs. Some sites include water charges in plot rental fees, while others operate on a pay-per-use system. Understanding these costs helps you plan both your budget and your water usage strategy.
Consider installing water collection systems appropriate to your site’s rules. Water butts connected to shed guttering can provide free irrigation during dry spells, while simple rain collection systems can supplement your water supply. Even small-scale collection makes a difference during summer dry periods. Water butt installation guides from the RHS provide practical setup advice.
Plan your planting layout with water efficiency in mind. Group plants with similar water needs together, and consider placing water-hungry crops like courgettes and beans closer to water sources. This approach saves both time and effort during the busy growing season.
Think about water storage and delivery systems that work with your schedule. Simple watering systems like seep hoses or basic drip irrigation can help maintain consistent moisture levels even when you can’t visit daily. These systems are particularly valuable for working plot holders who can’t provide daily attention during hot weather.
5. Plan Your First Season’s Growing Strategy
While it’s tempting to immediately start digging and planting, successful beginner gardening requires strategic planning. Your first season is about learning your plot’s characteristics while producing some satisfying results, rather than achieving maximum productivity.
Start small and expand gradually. Even if you have a full plot, consider actively cultivating only a portion initially. This approach allows you to learn without becoming overwhelmed by maintenance requirements.
Focus on reliable, beginner gardening crops for your first season. Potatoes, onions, broad beans, and lettuce are forgiving choices that provide good yields with minimal expertise required. These crops also help you understand your soil conditions and growing environment without requiring advanced techniques. The RHS vegetable growing guides provide detailed cultivation advice for beginners.
Consider the timing of your plot acquisition when planning your first plantings. If you’re starting in late winter or early spring, you can plan for a full growing season. Starting mid-season means focusing on quick-growing crops and planning for next year’s major plantings.
Plan for soil improvement alongside your growing strategy. Many plots benefit from organic matter addition, and your first season is an ideal time to establish composting systems and begin building soil health for future years.
6. Assess and Begin Essential Infrastructure
Your plot’s infrastructure needs will become clear through use, but certain basic improvements can be started immediately to support your growing plans. Focus on essential infrastructure that provides immediate benefits while avoiding expensive commitments until you better understand your needs.
Evaluate any existing structures like sheds, greenhouses, or cold frames. These valuable assets might need minor repairs or cleaning rather than replacement. A weatherproof storage space for tools and supplies is invaluable, and even a basic shed significantly improves your plot’s functionality.
Consider basic tool storage solutions that protect your investment and make plot visits more efficient. Simple weather-resistant storage boxes or tool racks keep essential equipment accessible while preventing rust and damage. Having basic tools readily available encourages regular plot visits and maintenance.
Assess your plot’s access paths and consider improvements that make visiting easier in all weather conditions. Simple modifications like adding bark chips to muddy areas or installing basic stepping stones can make winter plot visits more pleasant and practical.
Plan for future infrastructure needs without committing to major projects immediately. Understanding your plot’s potential helps you make informed decisions about investments like greenhouses, water systems, or permanent raised beds once you’ve gained experience with your specific growing conditions. Allotment infrastructure guides from the RHS cover planning permission and construction basics.
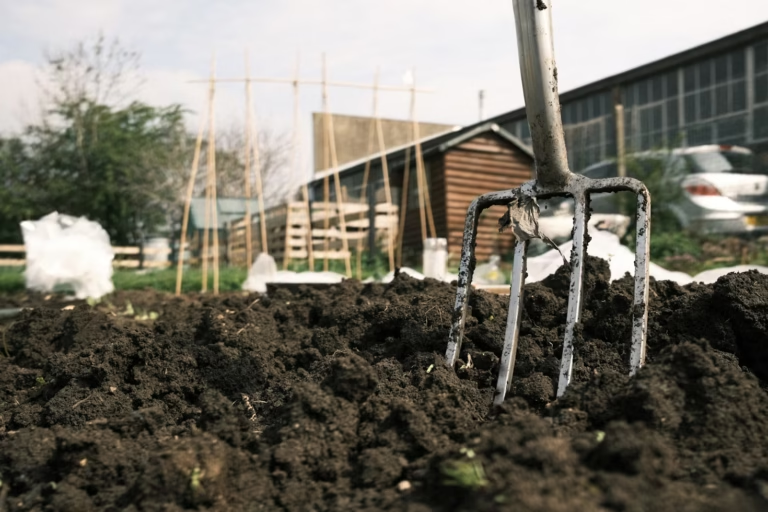
7. Start Small-Scale Soil Preparation
Soil preparation is fundamental to allotment success, but it’s also an ongoing process rather than a one-time task. Your first week should focus on understanding your soil and beginning basic improvements that will benefit your growing efforts.
Begin with simple soil testing to understand your plot’s pH and basic fertility levels. Home testing kits or professional soil analysis provide valuable baseline information that guides your improvement efforts. Most vegetables prefer slightly acidic to neutral soil (pH 6.0-7.0), and understanding your starting point helps you make appropriate adjustments. Professional soil testing services through the RHS provide detailed analysis and improvement recommendations (But likely not needed).
Clear small areas for immediate use rather than attempting to prepare your entire plot at once. Focus on areas with the best existing soil condition or the most convenient access for your planned first plantings. This targeted approach allows you to start growing while gradually expanding your cultivated area.
Begin organic matter incorporation in cleared areas. Compost, well-rotted manure, or leaf mould improve soil structure and fertility over time. Even small amounts of organic matter make a significant difference in soil health and plant performance.
Consider establishing a composting system early in your tenure. Composting provides ongoing soil improvement material while reducing waste. Simple composting systems can be established with minimal investment and begin producing valuable organic matter within months. Composting guidance from the RHS covers different methods suitable for allotments.
Start planning longer-term soil improvement strategies based on your assessment. Heavy clay soils benefit from organic matter addition and possibly raised bed construction, while sandy soils need moisture retention improvements. Understanding these needs helps you make informed decisions about future plot development.
Essential Resources for New Plot Holders
Government and Official Resources:
- UK Government Allotment Information – Official guidance on allotment applications and regulations
- Royal Horticultural Society Allotment Advice – Comprehensive growing guidance from the UK’s leading horticultural authority
- National Allotment Society – UK-wide allotment advocacy and support organization
Learning and Development:
- RHS Allotment Handbook & Planner – Seasonal planning guidance and expert advice
- Local gardening clubs and societies – Many areas have groups specifically for allotment holders
Supply and Equipment:
- Local garden centres for region-specific plant varieties and soil improvers
- Agricultural suppliers for bulk materials like compost and mulch
- Online seed suppliers specializing in varieties suited to UK growing conditions
Your Journey Forward
Your first allotment marks the beginning of a rewarding journey that connects you with the natural world, your local community, and the satisfaction of growing your own food. Remember that every experienced allotment holder started exactly where you are now – with enthusiasm, some uncertainty, and a plot full of potential.
The tasks outlined here provide a solid foundation for your allotment journey, but remember that learning happens through doing. Each season brings new challenges and discoveries, and the knowledge you gain from your specific plot and community becomes invaluable over time.
Don’t feel pressured to accomplish everything perfectly in your first week or even your first season. Allotment gardening is about patience, learning, and gradual improvement. The most successful plot holders are those who approach their plots with curiosity and a willingness to learn from both successes and failures.